Grid Spacing: How to Set the Gap Between Grid Levels
Grid spacing decides how often a grid bot trades and how much each fill earns. Learn to set the gap between grid levels using volatility, fees, and range width.
What grid spacing actually controls
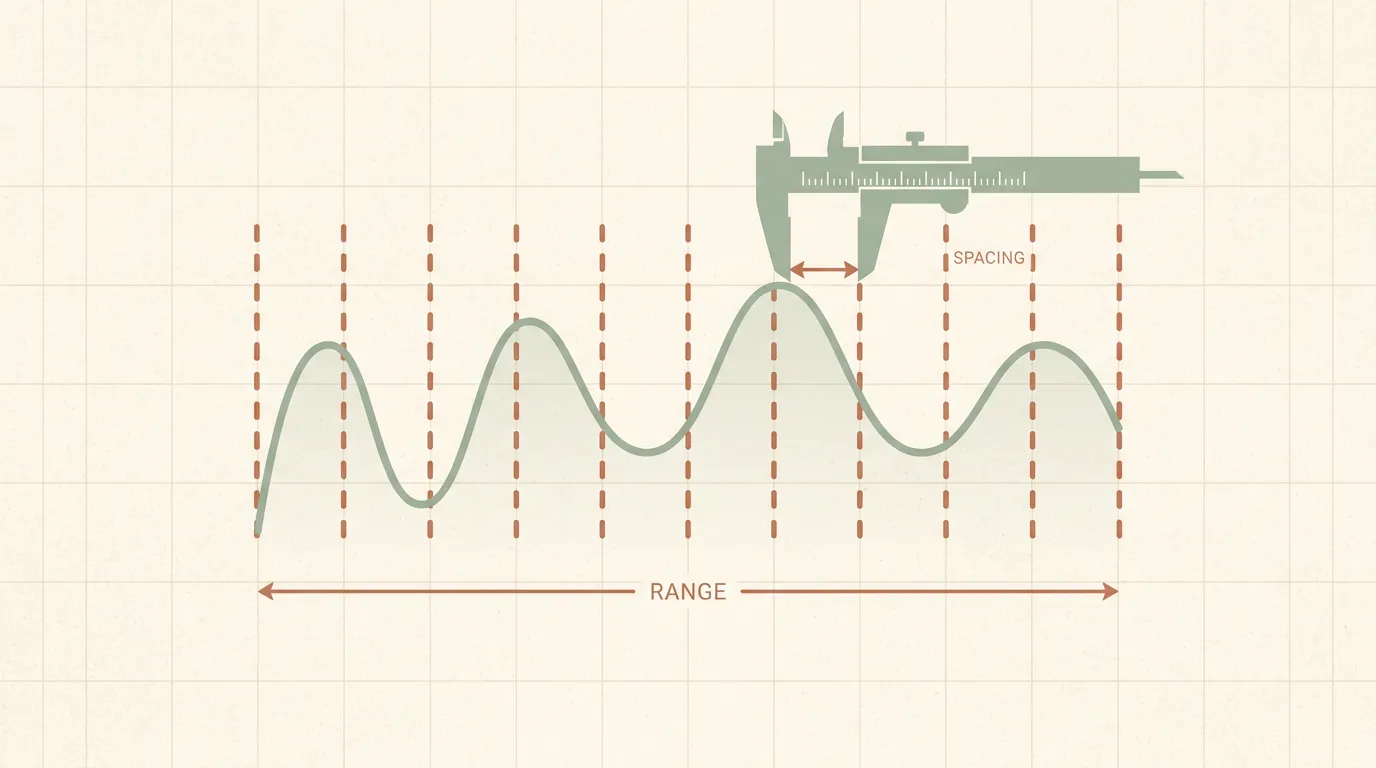
A grid bot places a ladder of buy and sell orders across a price range, buying each step down and selling each step up. Grid spacing is the gap between those rungs — and it's the setting that decides everything else.
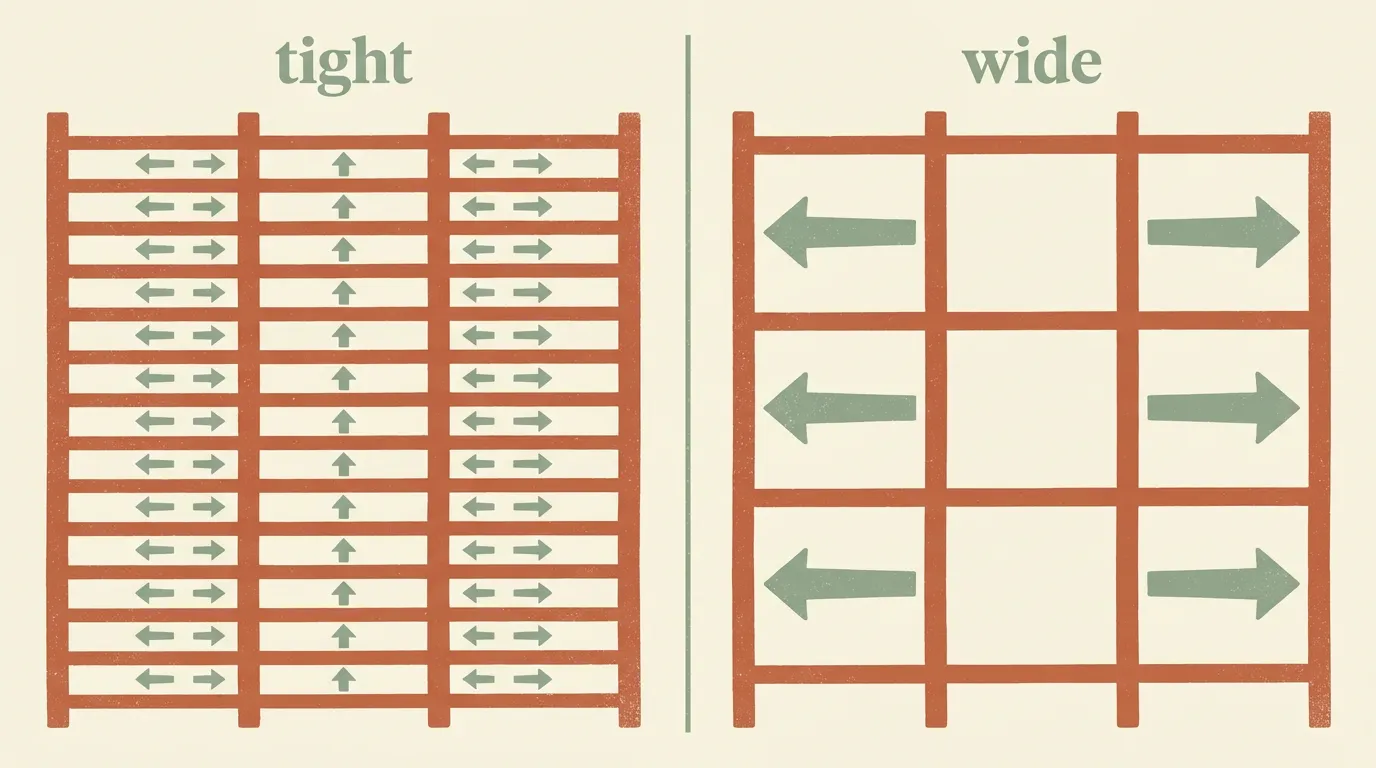
- Tight spacing = many small trades, more fills, thinner profit per fill.
- Wide spacing = fewer trades, bigger profit per fill, more idle time.
The right gap isn't a magic number. It's a balance between how much the market moves, what your broker charges, and how wide your range is.
Start with volatility, not a round number
The market's natural wiggle should set your spacing. If price routinely swings 1% in an hour, grid levels spaced 0.2% apart will fill constantly; levels spaced 3% apart may never trigger in a quiet week.
A practical anchor is recent volatility — how far price typically travels over your chosen timeframe. The gives you exactly this: an average range you can use as a reference unit. Spacing each rung a fraction of ATR apart keeps the grid tuned to how the instrument actually behaves rather than an arbitrary percentage.
Grid spacing should breathe with the market, not fight it. Levels that match real volatility fill at a healthy rhythm; levels that ignore it either spam trades or sit dead.
Every fill has to clear fees first
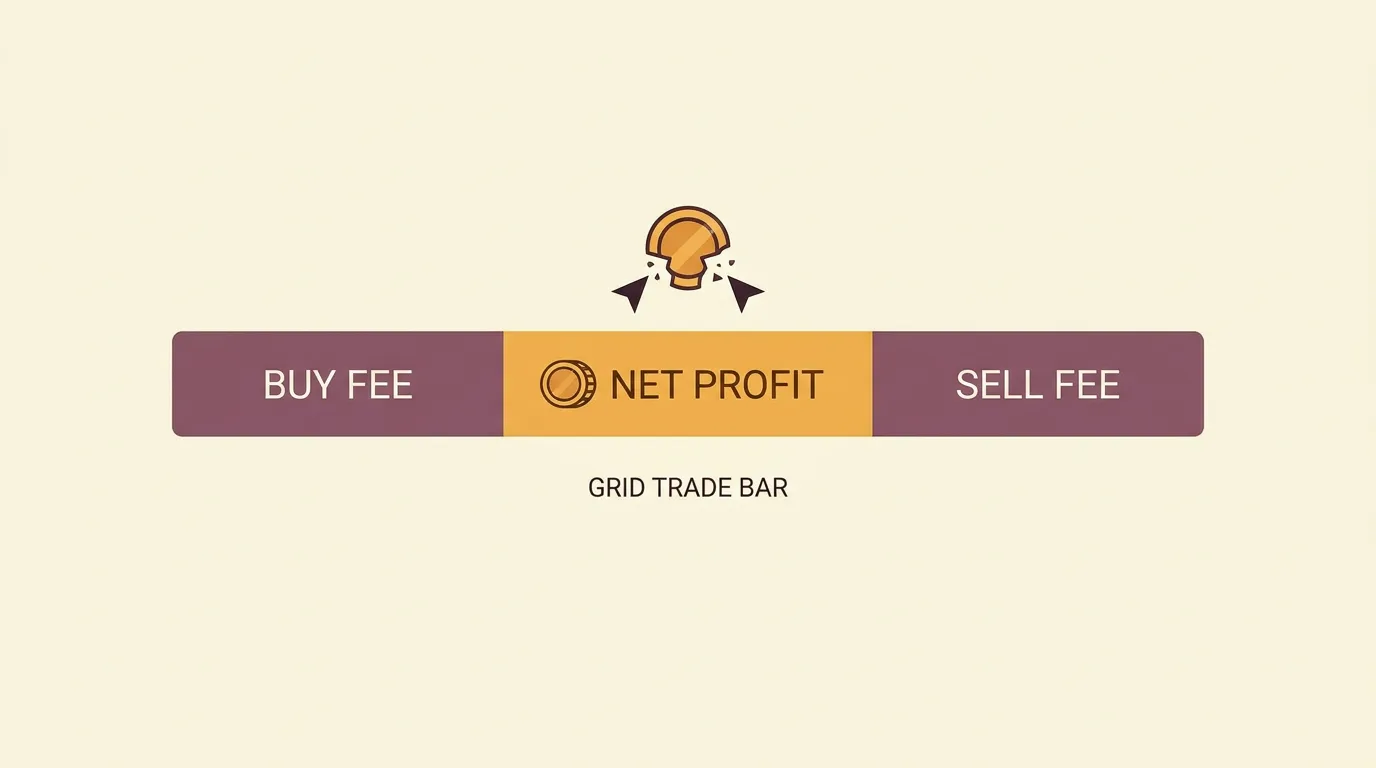
Here's the trap that quietly kills tight grids: each round trip pays fees twice — once buying, once selling. If your spacing is 0.15% but your broker takes 0.1% per side, the trade is already underwater before price moves.
Your minimum viable spacing is roughly:
A grid that looks profitable in theory can bleed on fees alone. Always subtract both sides of the commission before deciding a gap is "wide enough." On crypto, funding on futures grids adds another cost layer.
Choosing limit orders for grid fills helps here — they often earn maker rebates or lower fees than market orders. If that distinction is new, see .
Match spacing to your range and grid count
Spacing, range width, and number of levels are locked together — pick any two and the third is fixed. Divide your range by the number of grids to get spacing, or divide range by spacing to get grid count.
A workable process:
- Define the range. Identify the support and resistance boundaries where the market has been oscillating.
- Set spacing from volatility and fees. Use ATR as a unit; confirm the gap clears your fee floor with room to spare.
- Derive the grid count. Range ÷ spacing = number of rungs. More rungs need more capital, since each level holds a position.
- Sanity-check capital per level. Total budget ÷ grid count should still be a meaningful order size at your broker's minimum.
With algomax you don't calculate any of this by hand or touch code. You describe the range, spacing logic, and budget in plain language, and the assistant turns it into a ready-to-run bot you can backtest before going live.
Grids assume the market keeps ranging. A strong trend can walk price out of your bounds and leave you holding a stack of buys — so pair any grid with a plan for what happens when the range breaks.
Key takeaways
- Grid spacing sets the trade rhythm: tight = frequent small fills, wide = rare bigger fills.
- Anchor spacing to volatility (ATR works well), not a round percentage.
- Clear both fee legs plus a profit margin before calling a gap wide enough.
- Spacing, range, and grid count are linked — set two, the third follows, and check capital per level.